This is the first chapter of a long and rewarding “How To” article. This project is going to be very complex and time consuming. This is my ongoing build journal for a robot that I call
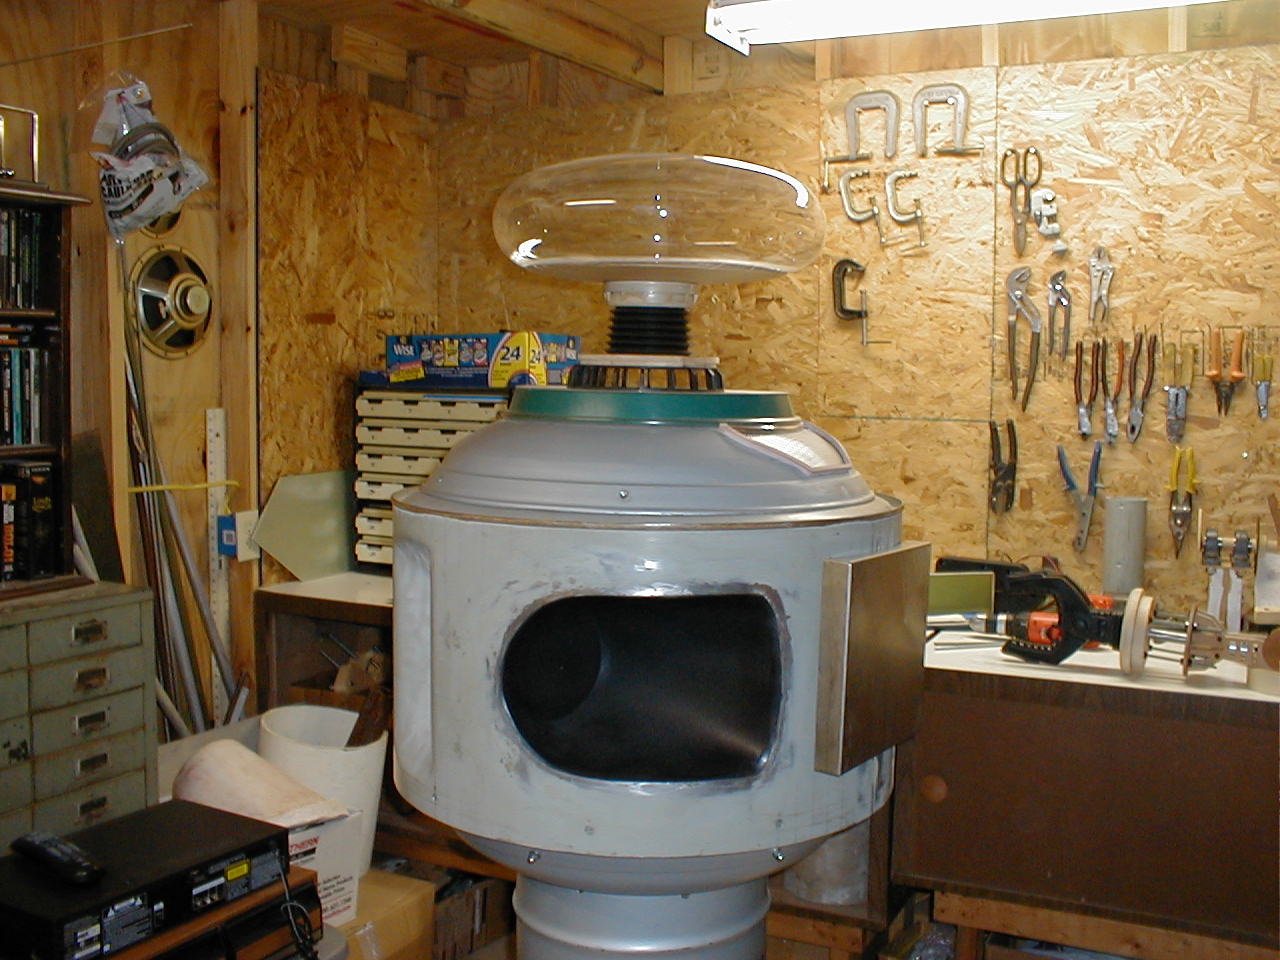
Magnus. He is approximately 6 foot tall and will weigh somewhere around 300 lbs. This robot will be built mainly for entertainment purposes. However, it will serve as a testing platform for more advanced robot control later on. It is also intended to serve as an inspiration to others to enter the field of robotics. If you are planning to build a large robot similar to this one, follow along, I hope that you will be able to use the information to your benefit.
Building robots can be a very fun and rewarding experience. There’s a very special feeling you get when you see something that you made with your own hands come to life and scoot around performing the things you programmed it to do. However, it can also be very frustrating if you don’t have the proper skills to take on a project of this scope. I’ve been kicking this robot idea around for 40 years now. Three years ago I decided get serious and bring all my sketches and drawings to life. Even now I still find myself having to learn new skills. But, don’t be disheartened. Take it one step at a time. Seek out advice from others and be patient. If you find yourself up against a wall because you don’t know how to do something, realize this fact, it’s not always
what you know… but what you can figure out. Listen to what your
common sense is telling you. Go with your gut. And remember; nothing is so complex that it can’t be broken down into small enough pieces for it to be understood. Research and learn what is needed. Use the web. It’s a wonderful tool…Oh, and one more thing…remember to have fun!
Things You Will Need:
Desire- A burning desire to build robots. If you don’t have this there is a very good chance you will fail.
Tools-Lots of tools or access to tools such as: hand tools, cordless drill, table saw, scroll saw, band saw, drill press, lathe, milling machine, belt sander, clamps, etc.
Large Work Area- You need lots of storage space and elbow room. You are going to make quite a mess.
Raw Materials- Wood, metal, plastic, etc.
Money- I’m not saying you have to be rich but, when building something like this it takes quite a bit of money. Plan and work out a budget. Figure out what you need next and save up for it. Find ways to earn extra cash. Sell something you don’t need anymore. You’re clever. You’ll figure it out. Who knows, you may even find a sponsor willing to make a donation.
Time- Understand that a project of this magnitude is going to take up much of your spare time. It could take years.
Patience- The capacity to accept or tolerate delay, trouble, or suffering without getting angry or upset. Get some:)
Information- You definitely need a computer with a good high speed connection to the web for research, obtaining parts and communicating with others that share your dream.
Junk- Yes junk! Collect all kinds of stuff. Try to see the potential in everyday, ordinary items. People throw away tons of good stuff like old broken printers, copy machines, radios, TVs and computers that are full of usable parts. Also collect things such as PVC pipe and fittings, metal or plastic rods and tubes, wire, pieces of angle iron, ball bearings and brackets just to name a few.
A Plan- You need to give some serious thought to what you want your robot to look like and what you want it to do. Break it down into systems, sub assemblies or sections and try to get an idea of what major components will be needed. How big will it be? What look or shape are you going for? What’s it going to made of? What type of locomotion will it need? Will it be remote controlled or autonomous or a little of both? What kind of sounds will it make? Does it need a wireless video and audio system? These are just a few of many things to ponder. Oh, one last thought… How are you going to transport it from place to place?
Friends- Friends can be very helpful. There will be times when you need an extra set of hands. Some of your friends may have a certain tool you need borrow or they can perform a specific task such as turning something on a lathe, machining a part or welding. Encourage your friends to let you know before they throw out something useful.
Determination- You must be determined to see this through. There will be times when you will feel like giving up. Don't lose site of your dream!
More coming soon!
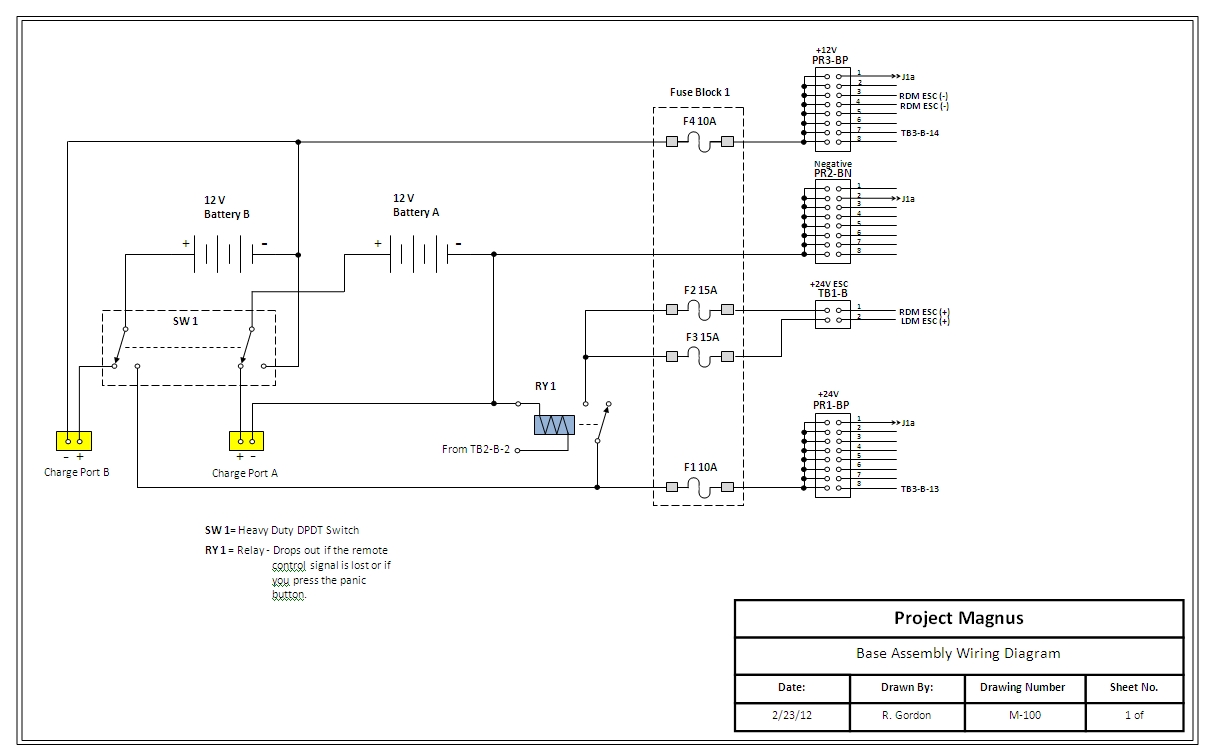
 You must give careful thought to choosing the right batteries for your robot. The power supply system for the robot must be able to handle the voltage and current ratings of the motors, lighting system, sound system, and control circuitry.
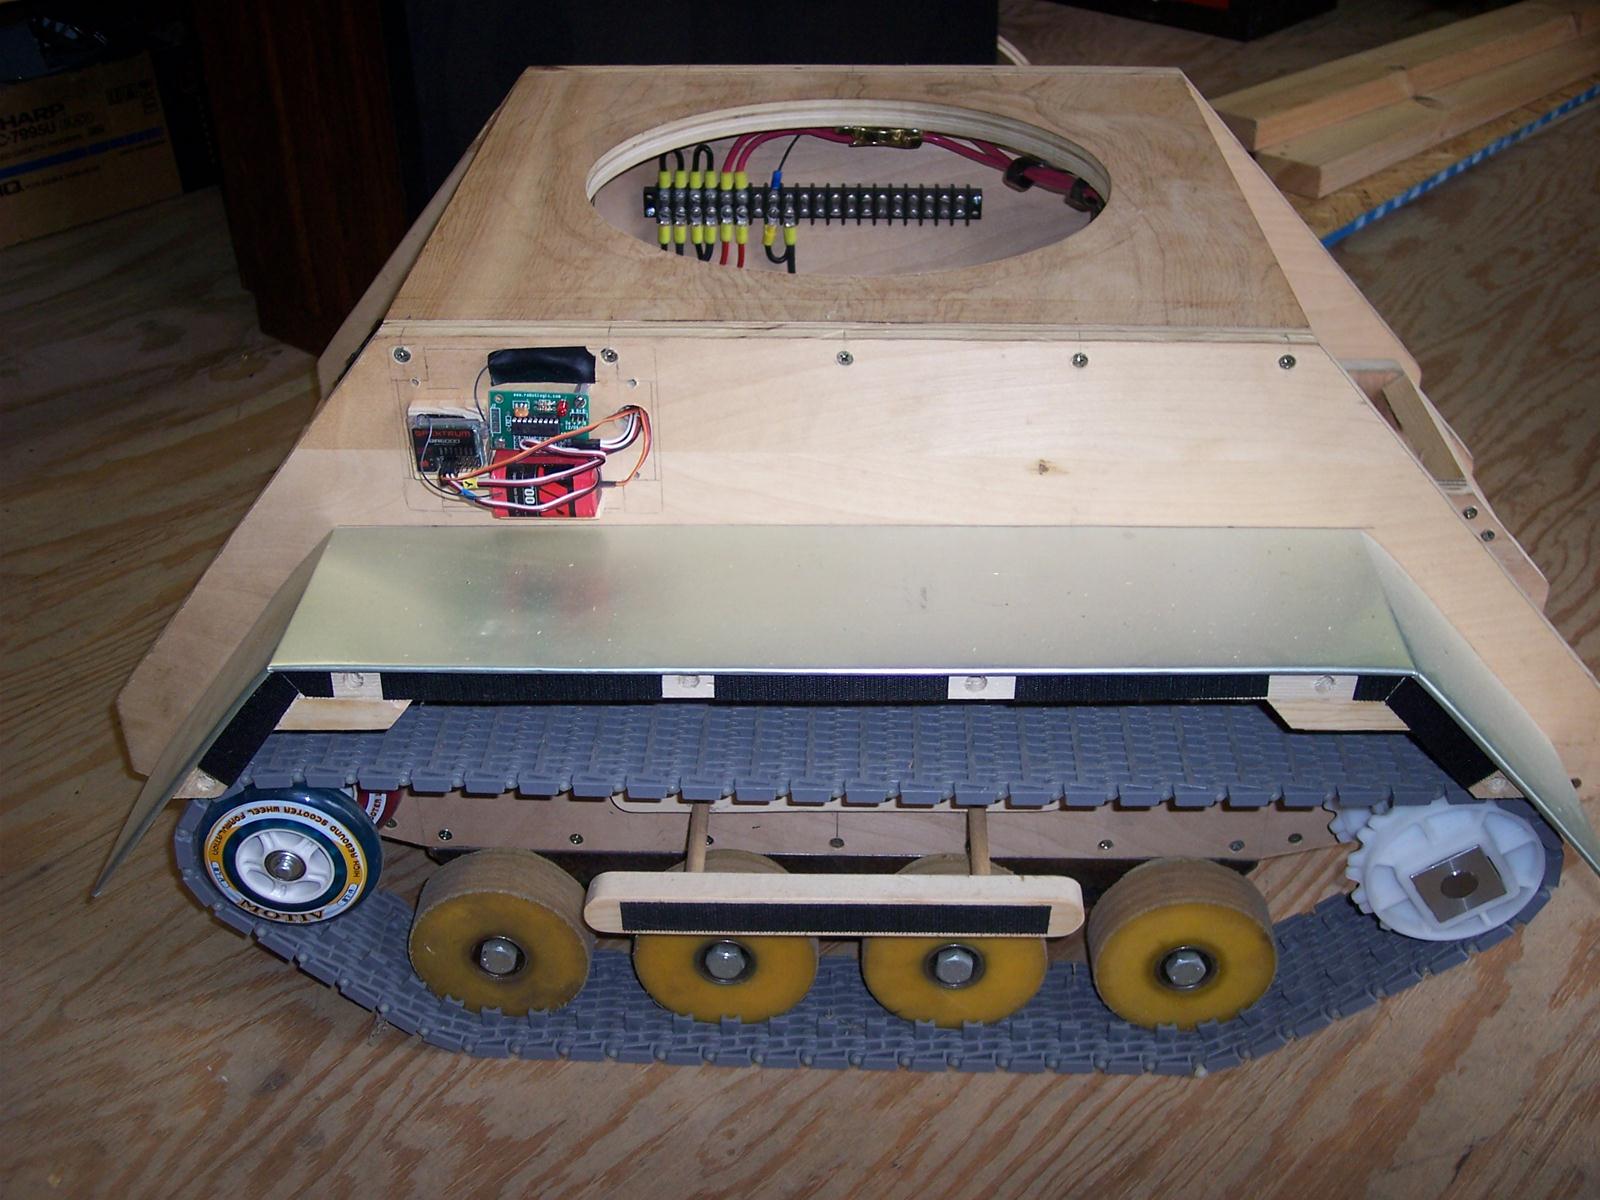 Tracks are my personal favorite mainly because they look so cool! They can be fairly hard to design and build but have some advantages over wheels or legs. Tracks act like giant wheels and provide terrific traction depending on what they are made of. Due to the way a track drive is constructed it can support quite a bit of weight and provide good stability (another reason I chose them). The length of each track is usually as long as the robots base. Their width will depend on the size and weight of your robot and will usually be 2 to 4 inches wide.
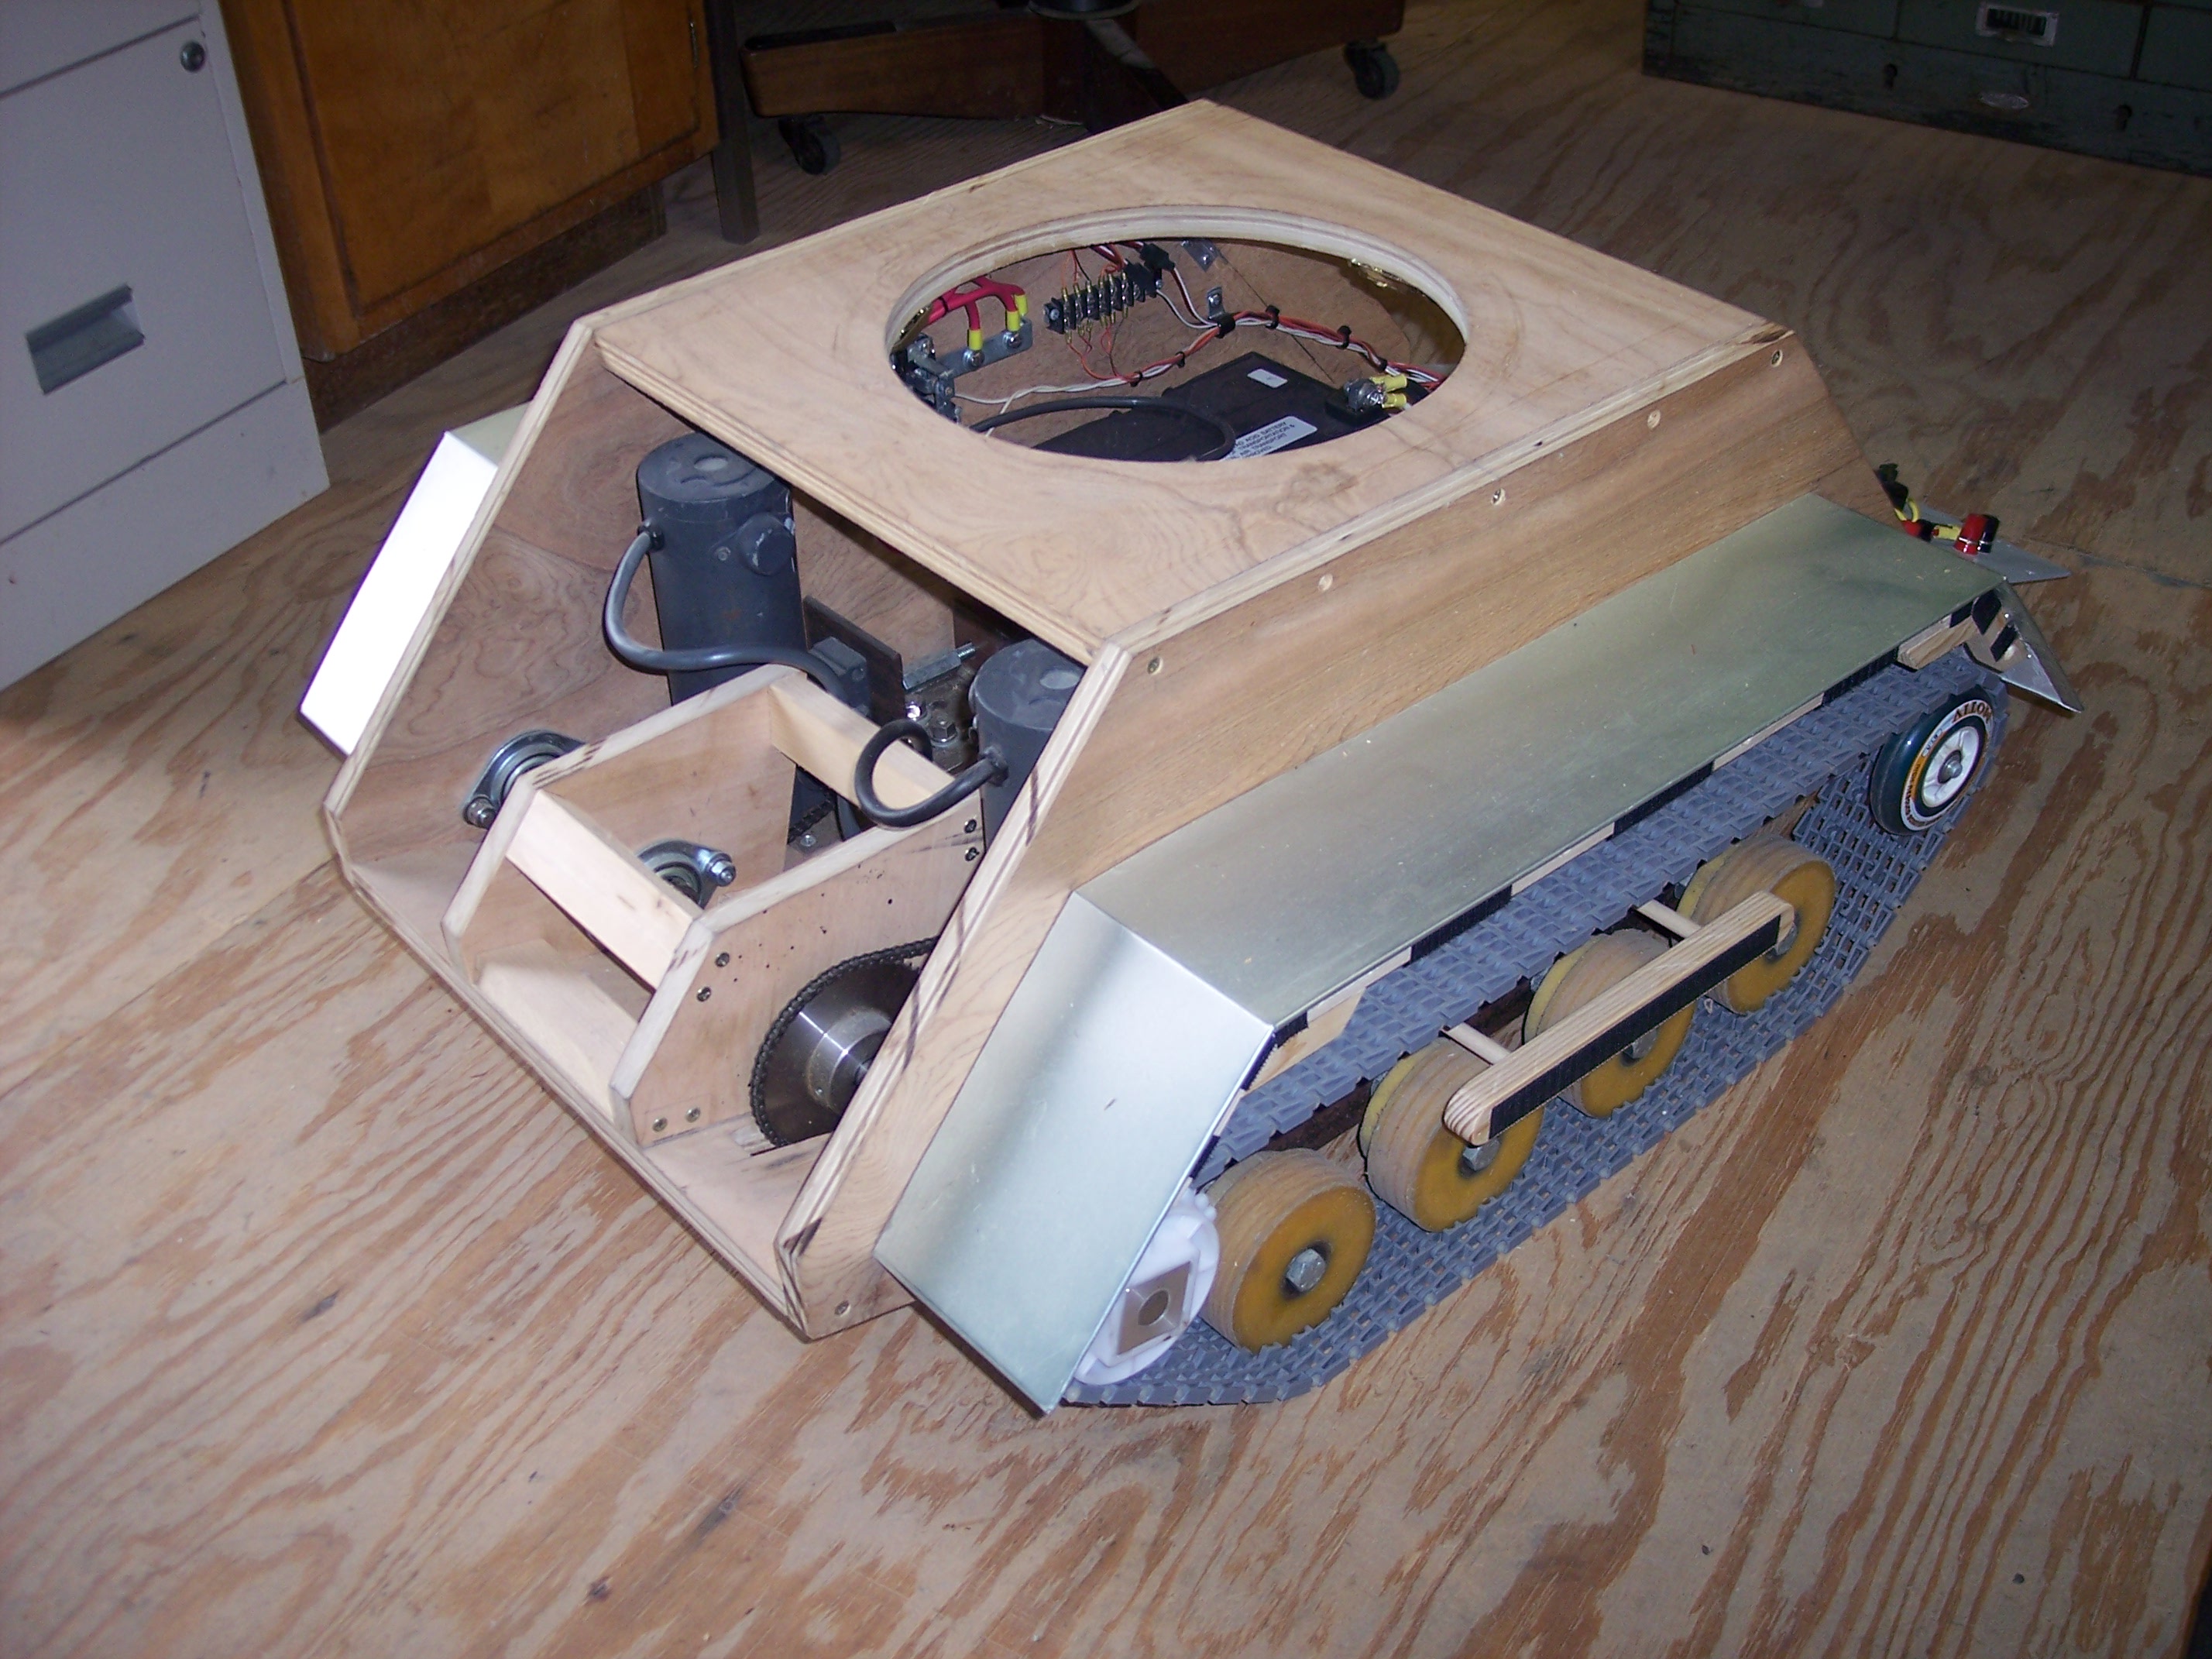
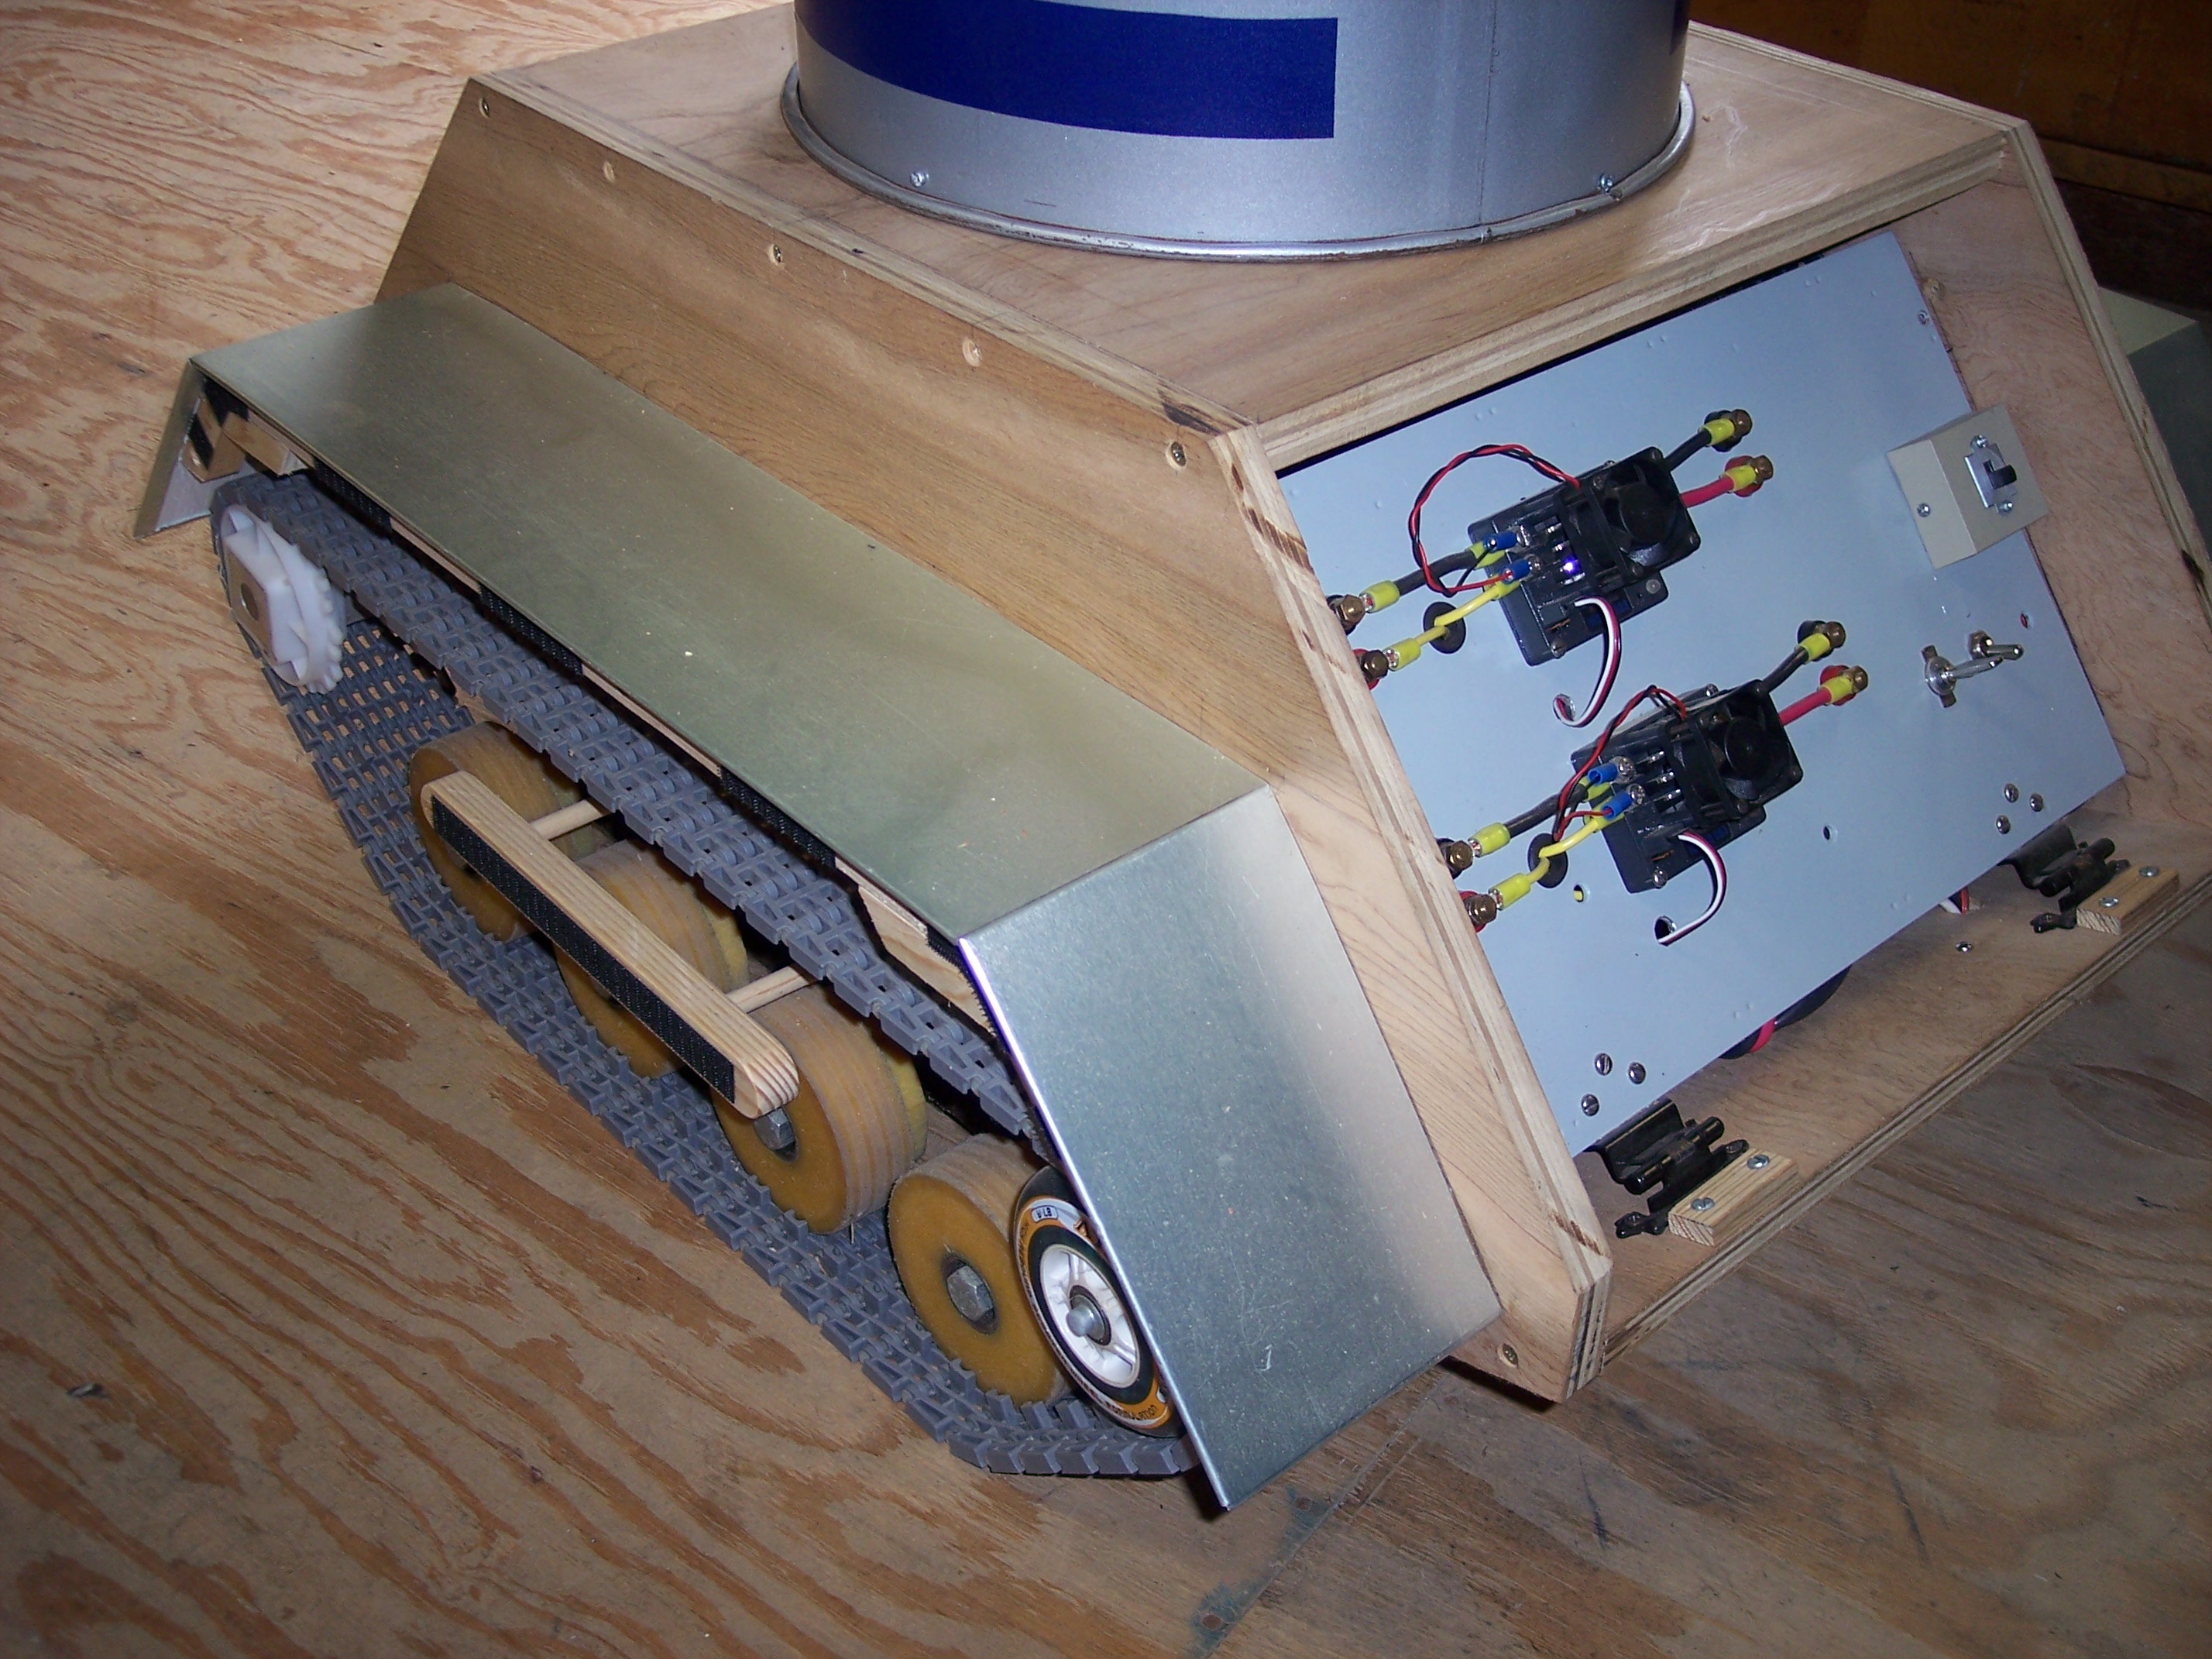
 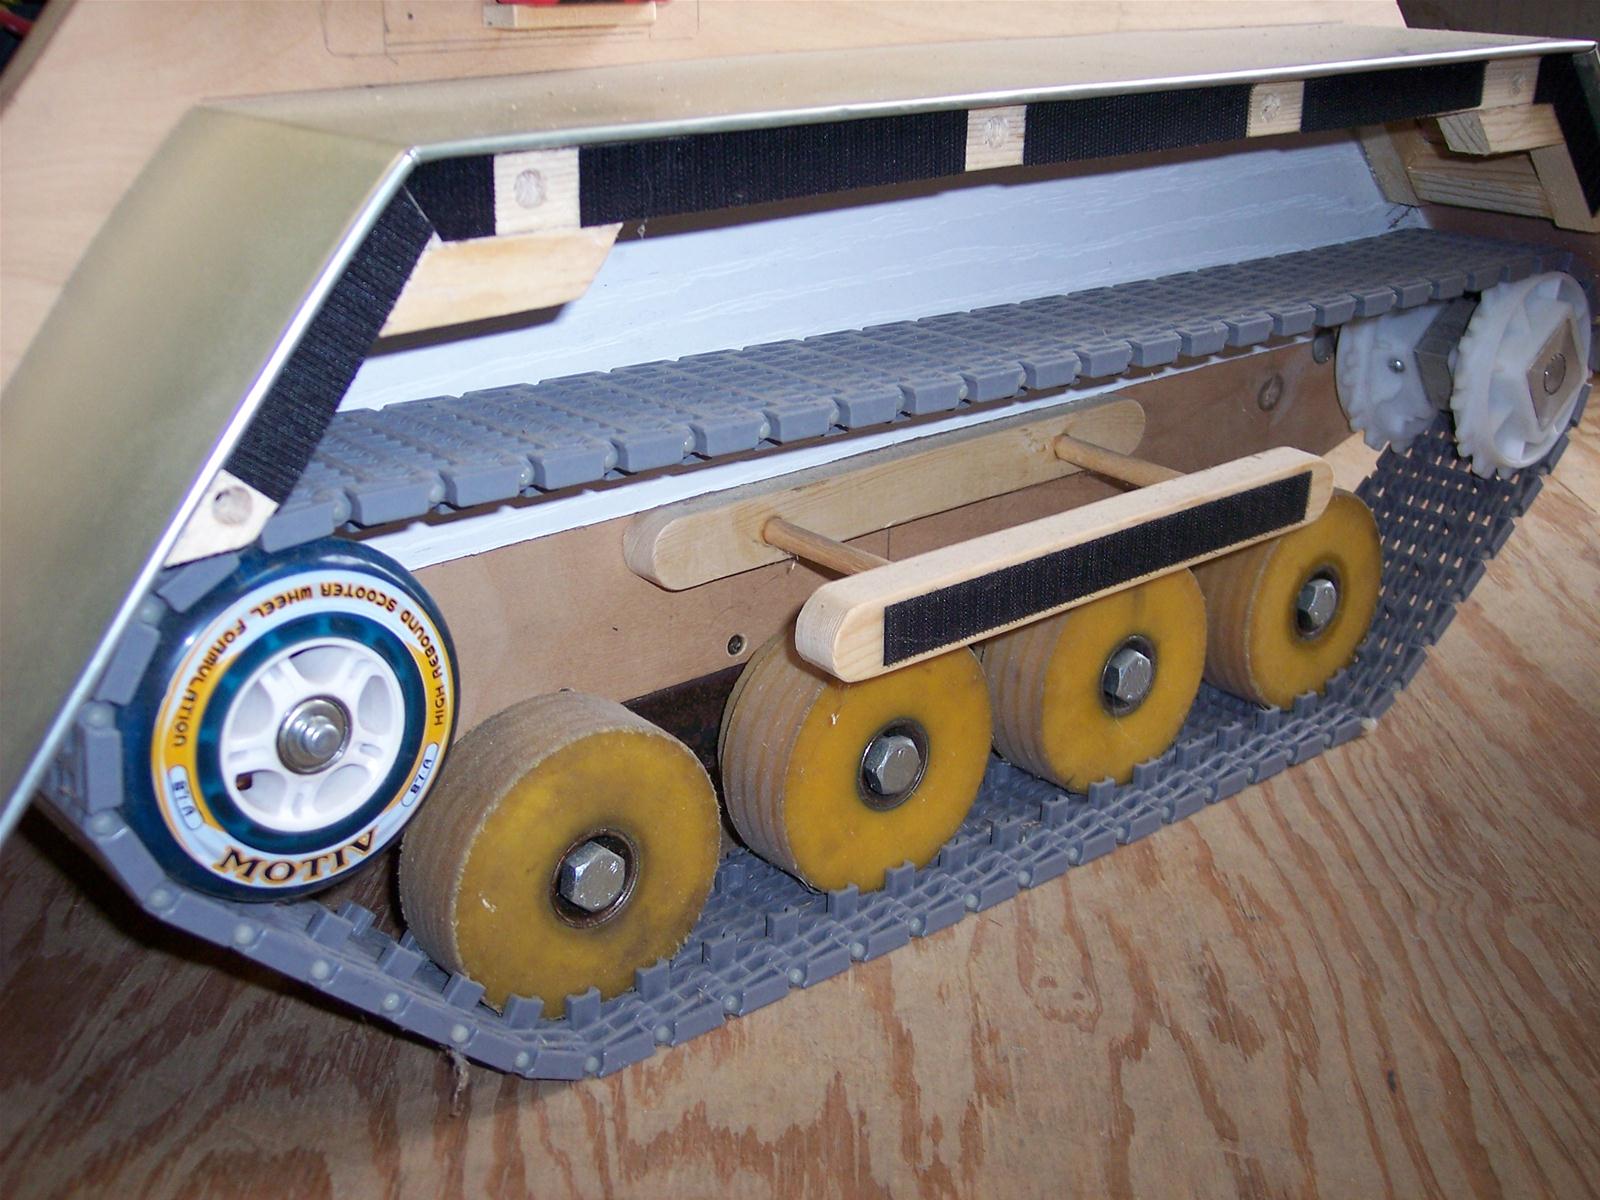 The length of the robot base will determine how many idler wheels are needed. The idler wheels will generally travel in a channel that is formed into the tracks. Some tracks have one single fin-like protrusion in the center that requires the idler wheels to have a groove cut into them. Or the idler wheels can be doubled up with a small space between each set. Whether it is a channel or fin, either one helps keep the tracks from being thrown off as the robot moves or turns. Each track will also need a drive sprocket and some adjustable method to keep them at the correct tension. The Razor scooter wheels shown in the picture are mounted on an axle at the rear of the robot base. The axle can slide in a slot and is adjusted by a pair of bolts that push against it to tension the tracks. More details and pictures will be coming soon in future chapters. Tracked robots can travel over almost any type of surface. Even snow! However, the biggest drawback is the damage they can do to flooring and carpets especially when making turns. Tracked robots should usually be driven outside.